The corner that went pale
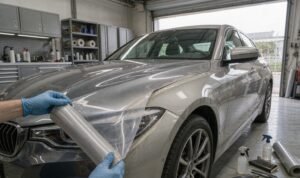
The car came back nine days after delivery. A gloss nardo grey colour change on a medium SUV, bumper and both front wings, film still perfectly bonded — no bubble, no lifted edge, no dirt underneath. The complaint was one word long: the corner above the left fog lamp was lighter than the rest of the bumper. Not a scratch, a pale wedge about forty millimetres wide that only showed in direct sun.
The shop blamed the roll. The supplier asked for photographs and blamed the install. Neither answer helps the next job, because nothing had failed. The film was asked to do something it can do mechanically and cannot do optically: it was pulled roughly 22 percent into a recess to avoid a seam, and the pigment layer thinned exactly where the customer’s eye lands first. That wedge is measurable on a 100 mm coupon before the car is even masked up.
Four numbers that decide whether a colour panel reads true
1. The pigment layer has a stretch limit of its own
TPU is sold on elongation. Data sheets quote 300 to 450 percent at break under ASTM D412, and that figure is almost irrelevant here. What matters is the optical budget: how far you can pull before the colour layer thins enough to shift lightness. On a pigmented film that layer sits at 10 to 25 microns inside a 180 to 215 micron stack. Stretch it 15 percent and pigment loading per unit area falls by roughly the same proportion; the panel reads lighter, and greys, silvers and pastels read lighter faster than black does. Clear TPU PPF tolerates 20 to 25 percent working stretch because there is no colour to thin. Pigmented film does not. Treat 15 percent as the ceiling on show faces, 5 percent within 100 mm of an edge, and anything above 15 percent as a place to inlay rather than pull through.
2. Where the colour sits in the stack decides how it fails
Three constructions dominate the market, and the spec sheet rarely says which you bought. In the simplest, colour sits on the adhesive under the TPU: cheapest to build, and the one that goes pale or micro-cracks on a hard pull, because nothing protects the pigment from below. A second type puts a polyurethane base under the colour, so pigment is protected on both sides, but TPU and PU answer heat and stretch differently and the interface carries stress that surfaces years later as delamination. The third encapsulates colour between two TPU layers of matched thickness, so both sides of the pigment behave identically under load.
Ask for layer order in writing, plus colour layer and total thickness. A supplier who cannot answer that in one email is telling you something useful.
3. Every overlap is a colour event
On clear film a 3 to 6 mm overlap disappears into the panel. On pigmented film it does not. Two layers of colour read as a darker line — typically ΔE 2 to 4 on solid shades — and on metallics the flakes in the overlap sit at a different angle, so the seam catches light twice and reads as a hard edge from three metres away.
So this changes layout, not technique. Fewer, larger pieces. Seams planned into shut lines and shadow lines rather than the middle of a door skin. Overlaps capped at 3 mm, never on a show face. Metallics cut in one direction off the roll, liner marked, because a panel cut against the grain reads as a different shade next to its neighbour .
4. Heat decides whether tension stays in the film
Forming temperature for pigmented TPU runs 45 to 60 °C, with 70 to 75 °C as the point where the colour layer starts to complain. Post-heating edges at 90 to 100 °C for 10 to 15 seconds per 100 mm is what keeps a wrapped edge down; skipping it is what produces the callback in week three.
The subtle part is relaxation: film pulled into a recess and post-heated immediately can shrink back as it cools, dragging colour and leaving a faint halo. Give it 10 to 20 minutes at room temperature after forming, then post-heat, then roll the edge while warm. Release the car after 24 hours and inspect under 1000 to 1500 lux at a 15 to 30 degree angle — the wedge above is invisible under flat ceiling light.
| What to ask | Why it matters | Pass range |
|---|---|---|
| Elongation at break, ASTM D412 | Whether the film can be worked at all | 300–450% for TPU; colour series often 250–350% |
| Layer order and colour layer thickness | Whether pigment can thin, crack or delaminate | Pigment encapsulated between TPU; colour layer 10–25 µm; total 180–215 µm |
| ΔE00 after 15% stretch, ASTM D2244, D65/10° | The only number that predicts a pale corner | ≤1.5 acceptable, >2.5 reject |
| ΔE00 after 20% stretch | Your safety margin, and where to inlay | ≤2.5 |
| Colour shift on a 3 mm double layer | How visible the seam will be | ≤ΔE 2, and never on a show face |
| Roll and batch number on the liner | Matching a reprint panel six months later | Every 1–2 m, traceable to batch |
| Post-heat specification | Whether the edge is still down in year two | 90–100 °C, 10–15 s per 100 mm |
The twenty-minute test that ends the argument
Step 1. Map the panel before you cut. Mark four zones: flat (0 to 5 percent stretch), single curve (5 to 12), compound curve or recess (12 to 20), corner wrap (20 plus). Anything above 15 percent is an inlay zone. This map, not the pattern file, sets the piece count.
Step 2. Read the stack and the numbers. Request layer order, colour layer thickness, elongation, and ΔE data at 15 and 20 percent stretch. If all they have is “self-healing, 10-year warranty”, you are buying a promise.
Step 3. Run a coupon test. Cut three 100 × 100 mm coupons from the same roll, mark a board at 10, 20 and 30 percent, stretch each, hold thirty seconds, release, wait ten minutes. Measure Lab* at each centre against an unstretched control and calculate ΔE00. Write the number on the job sheet: twenty minutes buys a shop standard instead of an opinion.
Step 4. Install to the ceiling, not to the clock. Work in sections at 45 to 60 °C, stop at the mapped ceiling, inlay the rest. Wrap edges 8 to 10 mm where the panel allows, trim 3 to 5 mm short where it does not, post-heat at 90 to 100 °C, roll every edge while warm.
Step 5. Inspect on day two, in the right light. Oblique light at 1000 to 1500 lux, plus a ΔE reading at the most-stretched corner against a flat reference. Under 1.5, release the car. Above it, decide now whether the customer will see it — because they will.
A job that paid for the extra hour. Two identical bumpers, same roll, same installer. Job A went on as one piece, pulled 22 to 25 percent into the fog lamp recess: 3.5 hours, corner ΔE00 3.6, pale wedge about 40 mm wide. The customer rejected it. Rework cost 1.2 square metres of film, roughly 60 to 90 USD wholesale, four hours of labour at 70 USD, and the referral that did not happen. Job B was inlaid in three pieces at a maximum 12 percent stretch: 4.5 hours, corner ΔE00 0.8, released first time.
The clear-film version of this maths — how far clear TPU PPF can stretch before it hazes — is a different budget with a different failure mode, and the two are worth reading side by side before you quote a colour job.
Pigmented film is a different product, not clear film with a tint: stiffer to work, narrower colour window, and it punishes layout mistakes that clear film hides. When a supplier sends Color TPU PPF samples, the first question is not which shades are trending — it is whether the pigment is encapsulated, and what the colour does at 15 percent stretch. Same discipline for any TPU PPF you buy by the roll: one bench test before the season, not a rework after it.
The line to hold
If a colour panel needs more than 15 percent stretch to sit down, it is not an installation problem — it is a layout problem, and the only place to fix it is on the bench, before the film touches paint.